Featured


Your Custom Text Here
The coconut milk makes these flatbreads super fluffy and fragrant and we love them with my coconut veggie curry or on the side of veggie bolognese when I serve it as a wholesome soup. Both meals are vegan which is perfect if you are trying to have a few more meat free days or packing in some extra veggies for the kids. You can also make mini flatbreads which are perfect for lunch boxes or picnics.
Add the spring onions to a food processor and blitz until finely chopped. Add the coconut milk and flour and blitz until you have a dough (it will be very sticky). Remove (use a spatula to get it all out of the food processor) and place in the fridge to rest for 1 hour or overnight.
When you are ready to cook: divide the dough into approximately 125g portions and roll out to around 20 cm diameter. Heat a large frying pan or pancake pan until piping hot and then cook each flatbread for 2 minutes or until large bubbles appear and it ‘fluffs up’. Flip and cook for another 1-2 minutes. Remove and repeat for the remaining dough.
For mini flatbreads: divide dough into 250g portions and roll out in a large sheet before using a cookie cutter to cut them out. Cook as above.
I don't think I'd trust someone who told me they didn't like chips and lets face it- kids LOVE them! So its handy to have a home baked recipe up your sleeve thats quick, easy and really not bad for you! My daughters love these served with my salmon fingers and a side of garden peas [see image below].
Preheat the oven to 200oC and line a baking sheet with baking parchment. Set aside.
Place the potato batons in a medium saucepan and cover with cold water. Bring to the boil and then reduce to a simmer and cook for 5-6 minutes. Drain and then steam dry for 5 minutes.
Place the potatoes on the baking sheet and sprinkle over the salt and oil and then toss everything together. Lay the potatoes out flat so there is no overlapping and place in the oven for 15 minutes. Rotate the baking tray and then place back in the oven for another 10-15 minutes until golden and crisp.
I have been on a quest to make the perfect baked sweet potato fries for sometime but I've realised that the only way to achieve a crispy finish is to coat the sweet potato in another ingredient and I don't want to do that. So- I've decided that I'm going to stick with good ol' sweet potato wedges and celebrate the soft, gooey texture and the blistering caramelised skins that nature gave us rather than make them something they are not.
---------------------------------------------------
Preheat the oven to 180oC and line a baking tray with parchment.
In a large bowl coat the wedges in the salt, pepper and oil. Place on the baking tray in an even layer and place in the oven and bake for 25 minutes or until tender and golden. Serve immediately.
This is such a fantastic recipe to have in your repertoire and kids love helping making the dough too! In fact, I originally developed it when my oldest daughter started to drop her nap and I wanted us to do something fun (and productive) in the extra time. The recipe below makes 4 medium flatbreads but just increase or decrease the quantities depending on how many you want but remember any extras can be portioned up and popped in the freezer to be used another day so always make more than you need.

---------------------------------------------------
---------------------------------------------------
Place the flour and yoghurt in a mixing bowl and mix until it begins to come together. Pop the rough dough out of the bowl and knead gently for a couple of minutes until you have a smooth ball. [Note: you can also use a KitchenAid (or similar) with its dough hook attachment but this does eliminate some of the fun for kids!]
Divide the dough into 4 even balls (or however many you are making) and cover. You can now place the dough in the fridge for up to 24 hours before using or pop in the freezer for up to one month.
When you are ready to cook your flatbread, remove one dough ball at a time from the fridge and place on a lightly floured surface. Using a rolling pin, roll into a circle approx 3-4mm thick. Heat a large frying pan, or a pancake pan if you have one, until piping hot. Place the flatbread directly onto the pan and cook for 1-2 minutes. Reduce the temperature if the bread starts to char. Flip the bread over and cook for 1-2 minutes on the other side. Remove and serve.
Cheese and tomato is a winning combination if ever there was one and here is a wonderful recipe to illustrate the fact! These light little filo quiches are surprisingly easy to make and are fantastic for lunch boxes or for a light dinner. You could also substitute some of the tomatoes for ham and transform them into cute little quiche lorraine.
---------------------------------------------------
---------------------------------------------------
Preheat the oven to 180Oc and lightly grease a muffin tin.
In a small bowl toss together the tomatoes, oregano and basil and set to one side. In a separate bowl whisk together the eggs, creme fraiche and cheddar cheese.
To prepare the filo: cut each sheet into 8 squares. For each quiche take one square, lightly brush with oil and then place a second square on top to form an 8-pointed star. Repeat with two more squares and then gently ease the filo into the prepared tin. Repeat with the rest of the pastry until you have 6-8 filo cases. Using a tablespoon, divide the egg mixture between the cases and finish with the tomatoes- the cases will be well filled. Place in the oven for 30-35 minutes or until risen and lightly golden. Remove and ease the cases out of the muffin tin and place onto a baking tray. Place back into the oven for 20 minutes to crisp up the cases. Remove and allow to cool completely before serving.
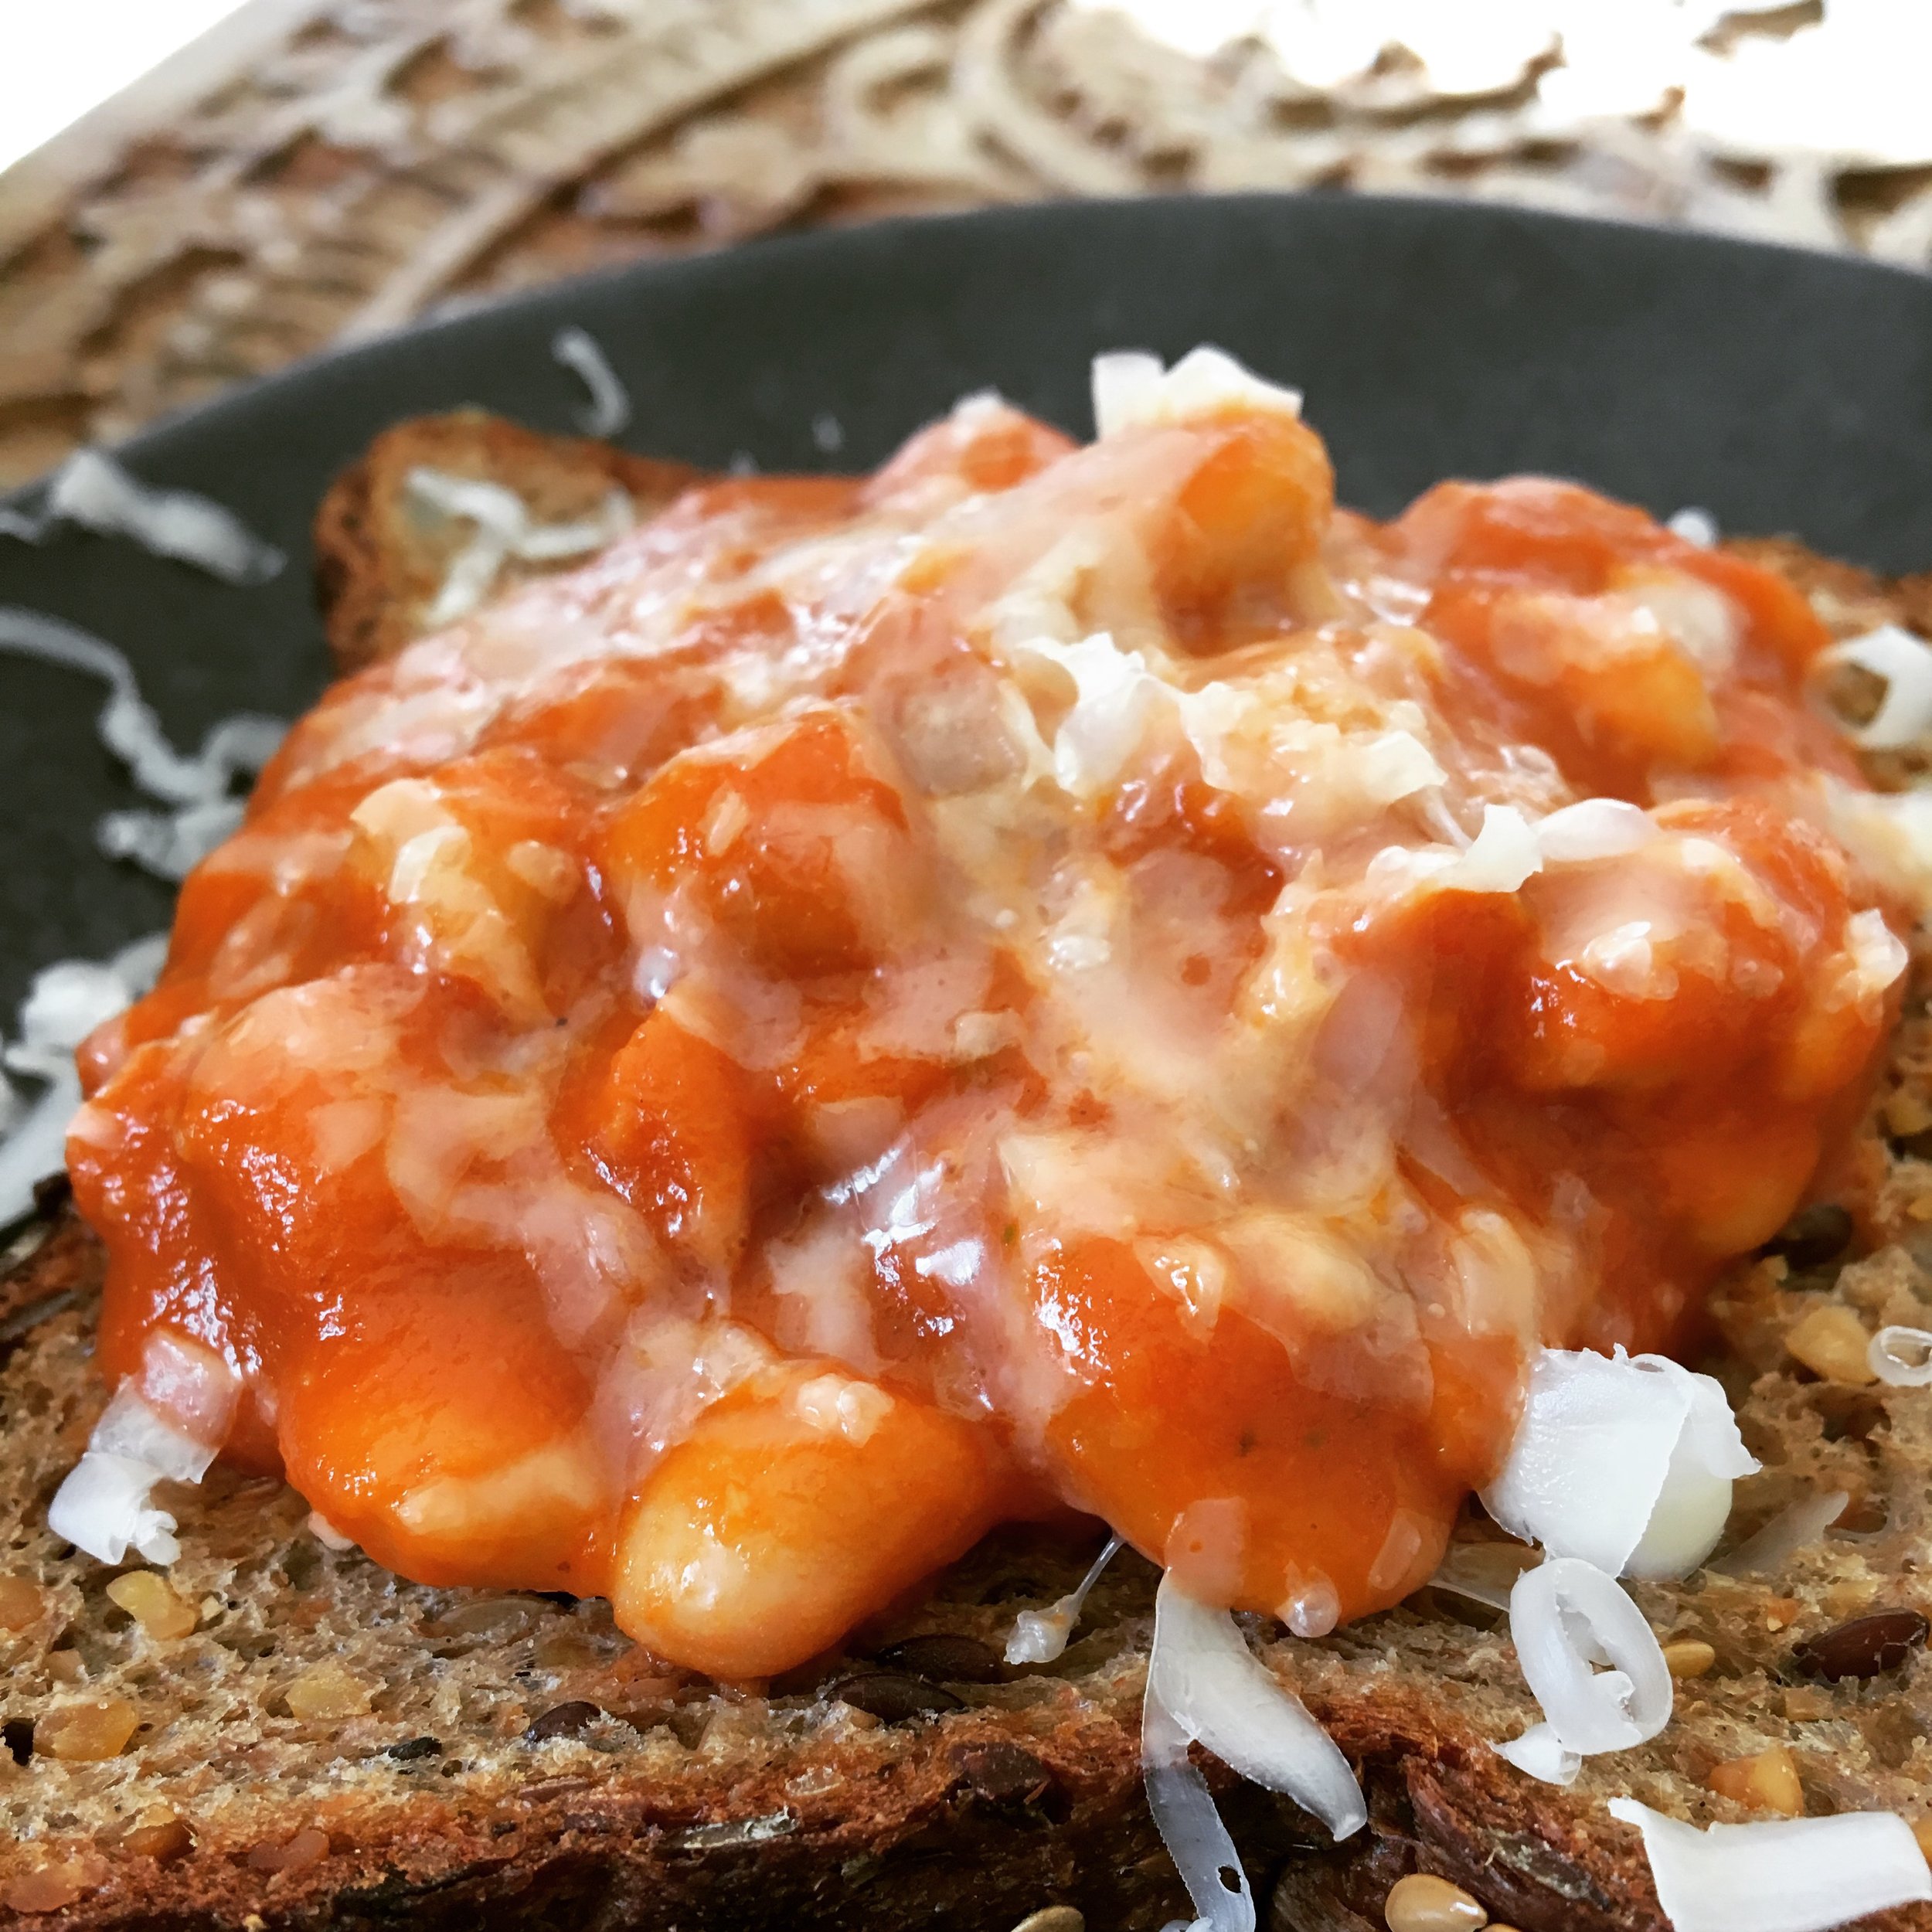
This recipe is utterly delicious and a wonderful store cupboard recipe that can be made in 20 minutes. Fantastic for babies but also a winner for older children and adults.
---------------------------------------------------
---------------------------------------------------
Make the tomato soup and remove half of the sauce from the saucepan and put aside for later use. Add the beans to the remaining sauce along with the Worchester sauce and maple syrup. Bring to the boil and then cook for 5 minutes. It is quite saucy so fill free to up the amount of beans if you want to but we like it this way- especially served with loads of grated cheese.
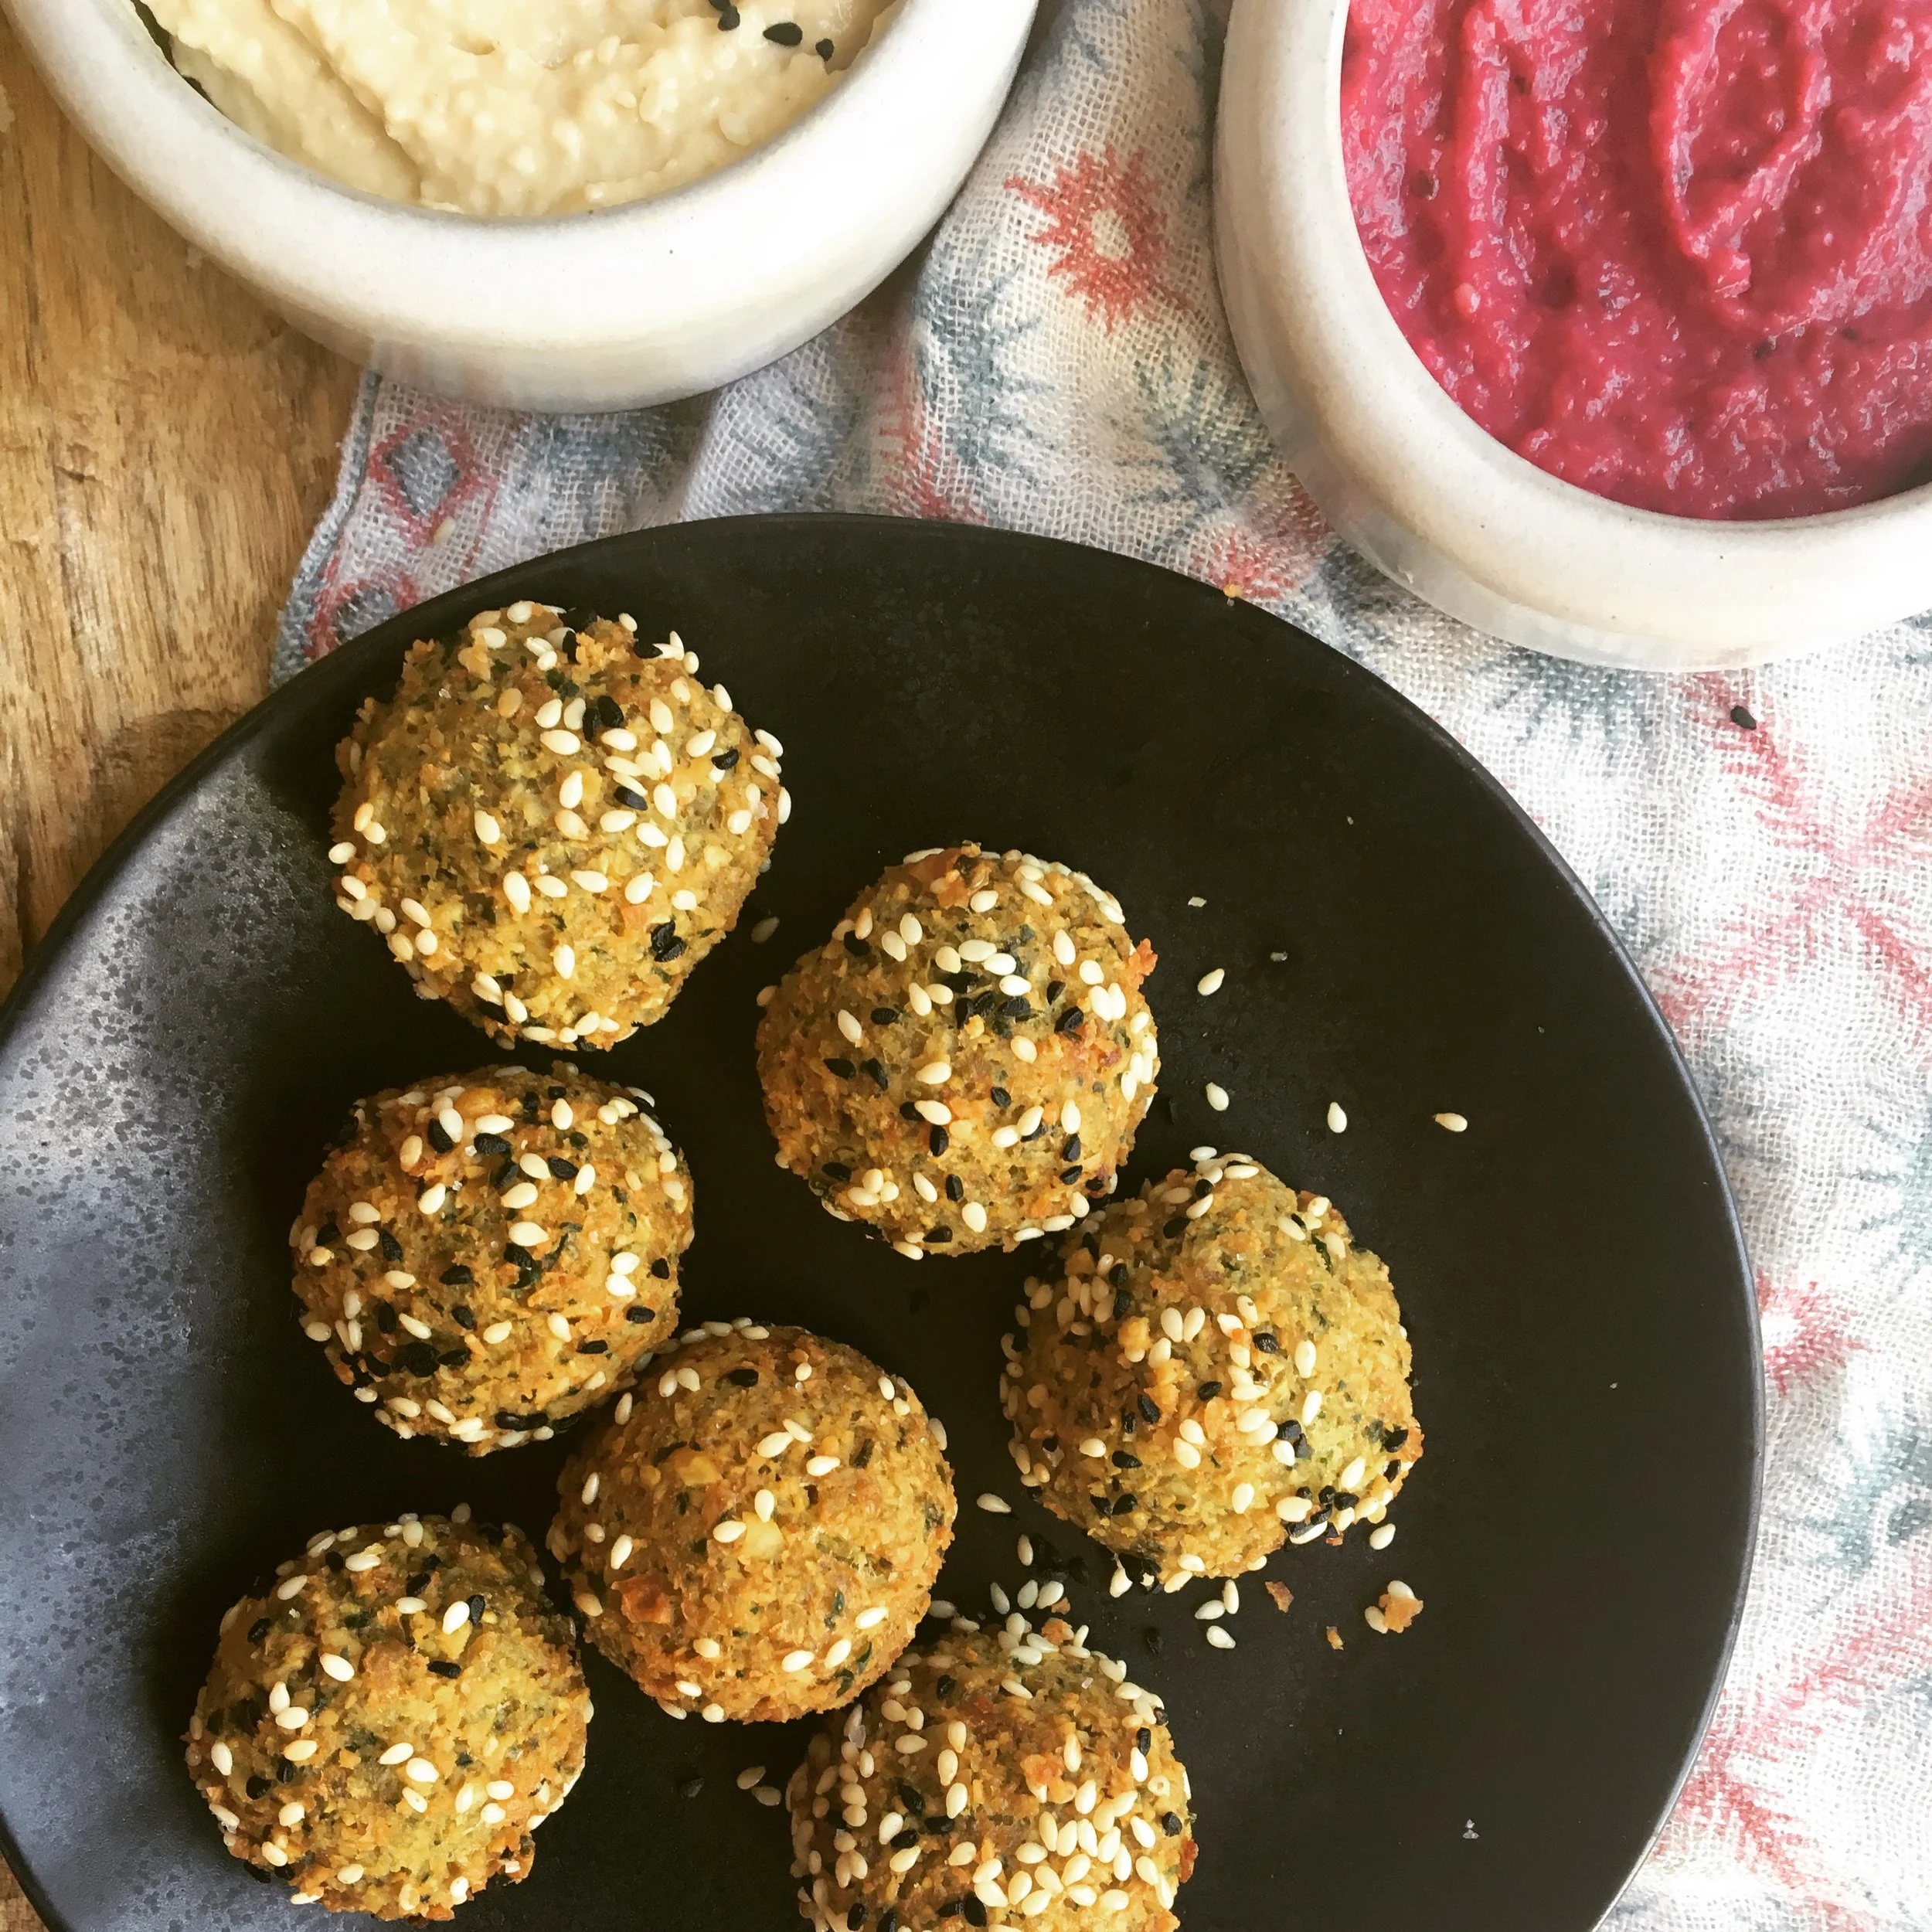
I love falafel but have had very little success over the years with homemade recipes. However, I have been determined to develop a failsafe straight forward recipe for sometime and I've finally struck gold. There are a lot of recipes out there that try and jazz up falafel using beetroot, sweet potato, cauliflower or quinoa to name just a few but to be honest you will never get the same delicious and satisfying flavour or texture than from pure and simple chickpea falafel so that's what I have stuck to. Pure and simple. Madeleine loves these little crispy morsels especially dipped into hummus (see pictured below).
[Note: don't try to shallow fry or bake this recipe as falafel was created to be deep fried so I'm afraid you are going to have to miss out if you want to avoid this. Needs must.]
---------------------------------------------------
---------------------------------------------------
Place all the ingredients, apart from the chickpeas and sesame and nigella seeds in a food processor and blitz for 30 seconds until everything is finally chopped and combined. Now, with the motor running, add the drained chickpeas a handful at a time over 2 minutes. You should have a rough and quite dry paste. Add 1 tbsp water. Blitz for 30 seconds.
Use a tbsp measuring spoon to scoop out the mixture and place each falafel on a baking tray. Place in the fridge for 2 hours to firm up.
Combine the sesame and nigella seeds in a small bowl and, once firm, roll the falafel carefully in the mixture to get a nice coating.
Fill a small saucepan with sunflower oil- you need it to be about 3-cm up the side of the pan. Heat the oil- it is ready when a piece of bread lightly sizzles once lowered in on a slotted spoon. Cook the falafel in batches of 4s for 3-4 minutes and remove with a slotted spoon onto kitchen towel to suck up excess oil and sprinkle over sea salt if using. [Note: do not cook for less than 3 minutes or in hotter oil as you need this length of time to get the crispy exterior and crumbly interior!] Serve immediately with hummus or beetroot & feta dip or allow to cool and keep in an airtight container for 2-3 days.
With all the best intentions its just hard to resist crisps and its inevitable that whatever I’m eating my daughter wants so I have come up with this recipe so we can both sit and enjoy a good ol’ bag of crisps- albeit a far more attractive and colourful variant! Slicing the sweet potatoes can be tricky if you haven't the knife skills of a chef so a mandolin can be a very handy tool to have in your kitchen! Otherwise go slowly and carefully.
---------------------------------------------------
---------------------------------------------------
Preheat the oven to 120oC and line two large flat baking sheets with baking parchment. Place the prepped potato into a bowl and drizzle over the olive oil. Use your hands to ensure the slices are evenly coated. Now spread the slices over the two baking sheets in an even layer with no overlaps. Place in the oven for 45 minutes-1 hour and then turn off the oven and leave the slices inside to crisp up for a further 30-45minutes. Remove and allow to cool completely before munching or storing. [Note: they will soften once stored but quite frankly they are delicious then too!]
Just for adults? add 1/4 tsp salt to the olive oil or sprinkle over your own portion
Popcorn barely needs a recipe but its such a fantastic snack option for kids and adults that I had to include it! I personally like my popcorn savoury and my daughters have yet to realise you can get sweet mixes but you can obviously add some maple syrup or agave if you want a sweet hit. I also love mine with a teaspoon of marmite (don't judge!).
---------------------------------------------------
---------------------------------------------------
Place 1 tbsp olive oil in a saucepan over a medium-high heat and once hot add the popcorn. Toss to coat the kernels in the oil and then place a tight fitting lid on top. You will hear sizzling before popping but don't be tempted to take off the lid. Give the pan a little shake every 30 seconds or so. The popcorn is all popped when the pops are 3 seconds apart. Remove the lid and drizzle over the final 1 tbsp olive oil along with the sea salt. Place the lid back on and give everything a big shake.
To store: keep in an airtight container for 3-4 days.

![JK_Email Signature 2018_96dpi[3][189].png](https://images.squarespace-cdn.com/content/v1/55e533f4e4b02deb84910f6a/1540791763715-X1MI7XNIKEOWA2BLUJHN/JK_Email+Signature+2018_96dpi%5B3%5D%5B189%5D.png)
